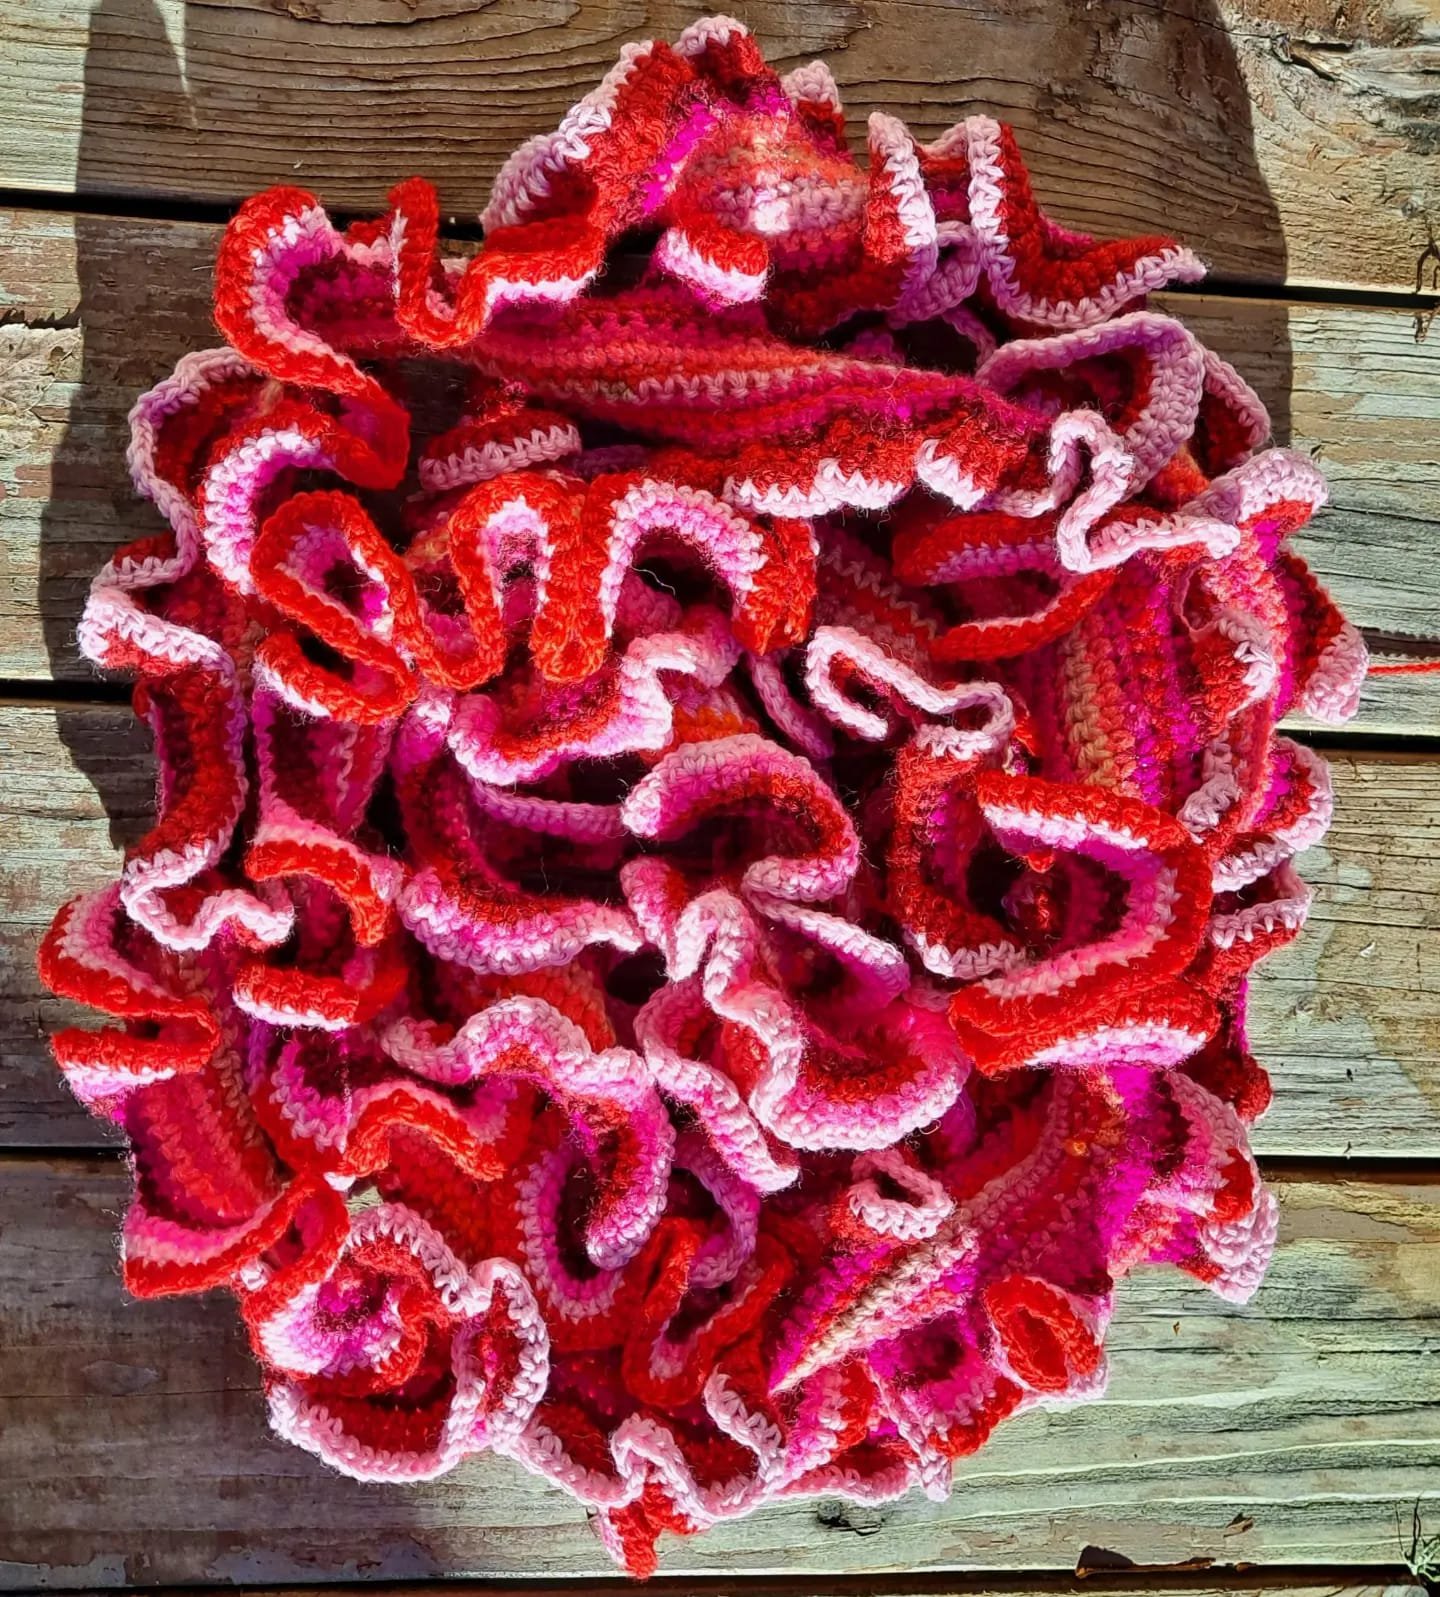
A Tube Full of Coral by CHRISTINA HARKNESS

As folks have been creating and sending in corals for the PNW Community Coral Reef, I have been concentrating on creating the large pieces that will anchor our reef. I seem to be getting larger and larger with each piece that I make. It started with the pink coral that I named Audrey 2.

The next big piece was the bleached coral vignette which is a few inches taller than Audrey 2.

And now I am working on my “tube of corals”. The intention with this piece is to create a spiraling piece that will be supported by an armature wire internal frame.

It starts with crocheting a flat piece which will be folded into a tube. This piece is 9.5 feet long. I used an acrylic yarn base which will end up getting hidden by the future corals. I’m saving the outside for my more delicious wooly yarns.

After folding the piece in half, I crocheted it closed along the long edge and made sure to crochet only on one side of each of the ends so it doesn’t get crocheted closed.

It ends up looking something like this. I can fit a finger into the tube which is important when considering I will need to fit sculpture grade armature wire through it in the future.

Now, I go around the piece with the intention of creating a hyperbolic frill along the edge. I started out increasing every second stitch which quickly turned into increasing every stitch as I realized I would be crocheting forever just to get the frill to start. Fairly quickly, it took more than a skein just to get all the way around.

After I was able to get a decent frilled edge, I started creating hyperbolic corals in sections, along the edges.

The weight is really incredible. Hyperbolics use A LOT of yarn.

I chose one end to be the top of the spiral when I wire it and I have included some ringlets which will hang down.

Even without being wired, it is quite beautiful to look at. It also shows just how many more feet I have to go,

I took what I have completed so far out to the Coast yesterday for a photo op in the sun.

While I realize that folks who are making corals for our reef are probably not going to get as involved as this, I wanted to show that you can get as creative as you like when making these beautiful reefy bits.

Fiber Fusion NW by CHRISTINA HARKNESS

I just got back from Fiber Fusion NW, like literally. I put my bags down and here I am.

It was such a great experience! I was able to connect with a large amount of Washington fiber folks and connect with some yarn stores as well. We will now have donation bins at Stranded by the Sea in Edmonds, WA and Fidalgo Artisan Yarns in Anacortes, WA. I also met some wonderful folks from Peninsula Fiber Artists and will be working with them to drum up interest in my coral crafting day at the Feiro Marine Life Center in Port Angeles on Saturday, November 19th.

For now, I am going to rest and unpack my traveling reef tomorrow. Next month we will be at Black Sheep Gathering with two whole tables of the reef. Next weekend? Crafting in Lincoln City, OR on Saturday from 10-4 at the Lincoln City Cultural Center.

It’s very important to me to engage with the fiber folks across the PNW in creating this reef. I’m really enjoying meeting such creative people!

Plate Corals by CHRISTINA HARKNESS

I believe I discussed plate corals a few months ago in the context of how I made them for my small fiber art projects. I have recently been figuring out how to make them for display in our reef.

This is a fingering weight yarn that I have been crocheting held double so a single strand of sport or Aran weight yarn would probably give you a similar feel. I simply single crochet a circle until I get it large enough to make me happy and then I alternate using single crochet for some sections and double crochet for other sections which gives it a wavy edge.

I am then sewing it onto plastic canvas to make it flat and sturdy and crocheting a tube for it to stand on. I then sew the tube onto the plastic canvas. The tubes will then be stuffed and once I complete five or more, I will put them all together and sew them onto a base. I want to keep their edges overlapping so the tube height has to be variable.

I know that it can be cringe worthy to use plastic canvas but I always source my plastic canvas from resale shops. Recycling it is the best way to go.

Bleached by CHRISTINA HARKNESS

Along with my effort to make taller healthy coral pieces, I have been working on and off on my tall bleached piece for a few months now. I still have a little bit to fill in but it is coming along nicely.

The tall structure is two PVC pipes that I crocheted a tube to cover. The base is two blocks of recycled Styrofoam that I also crocheted a cover for. The PVC pipe is embedded into the Styrofoam and sewn in place. I must admit that it is a little rickety and in the future I will create a larger base for these taller corals.

The black piece lying separate is a mailing tube covered by rug loops which I looped together to form a chain and then crocheted into a tube to create a feeling of an abandoned hawser which might be found in the sea. (The large white coral on the bottom left of the first picture is also made of crocheted rug loops).

Each of the separate pieces on the bleached reef structure is created separately and sewn onto the covering for the PVC pipes or Styrofoam blocks.

I must admit, I find myself packing ALL OF THE STUFF I come across, mailing tubes, packing materials, a plethora of ridiculous items, into my closet because I JUST MIGHT USE THEM IN THE REEF!!!


Gaining Height by CHRISTINA HARKNESS

Once again, time has wooshed past me and I haven’t updated here. It’s not that I haven’t been busy or been making corals, in fact, I have been working on some larger pieces.

Recently we had a donation of several skeins of pink yarn and I have been thinking of ways to gain height on the reef. This pink coral (which I have lovingly named “Audrey 2”) is 22 inches tall and stuffed mostly with polyfill. The base is a circle of cardboard with two bags of rice taped to it. On the very bottom is a circle of plastic canvas which I have sewn to the bottom edge of the coral.

This is an entirely free form shape in which I crocheted a big tube and then divided that tube into three branches. By increasing in one side of the tube and decreasing into the opposite side of the same tube, I could make the tubes curve and curl. I then crocheted separate smaller branches and sewed them onto the larger branches.

I feel the addition of other coral forms on top will help to connect it to the corals which will surround its base once it is placed in the actual coral reef.

I have also been working on taller bleached pieces. More on that next time!